How to use DeForum in Stable Diffusion and 2D settings made easy
- justthetipwithdani
- Nov 20, 2022
- 7 min read
Updated: Nov 22, 2022
Here is an installation video if you haven't seen this yet:
Let me start by saying I have separate post for installing DeForum and it has gotten extremely easy. You can find that info here.
With that out of the way let's get started...

Click on the picture to enlarge it

First let's take a look at the Stable Diffusion Checkpoint Selector, select the one you want but I would stick to the V1.5 pruned emaonly.ckpt version while you're in testing mode.

Next, we have the generate button at the top right, you will press this once you get all your settings down and it will run the code.

RUN TAB
Let's take a look at the run tab first. Most of these settings are exactly the same as your Stable Diffusion Options. You can also hover over each setting to get a brief explanation of what each option does.

Overwrite settings will use a file path for a previously saved setting. Every time you run this it would save your settings if you enabled it at the bottom (we will go over this) and put it in the Stable Diffusion > Outputs > Img2Img > DeForum folder (default)
Next up we have the Height and Width, this is self-explanatory but I left a link to a Height and Width resolution to Aspect Ratio table so you can figure out what 9:16 or 21:9 is in resolution pixels.


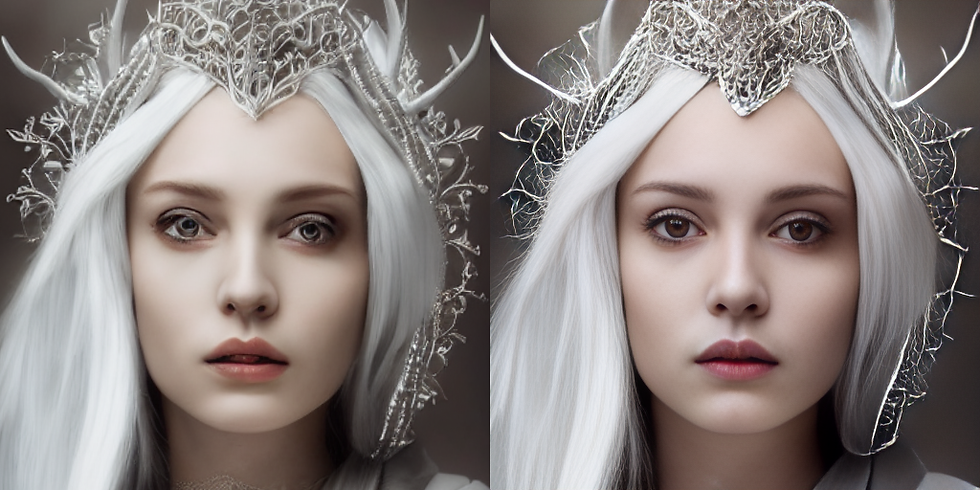
Restore faces will use GFPGAN or CodeFormer to restore faces and it does an amazing job. Check out some samples of how effective these can be.

This doesn't a very good job on the messed-up eyes and teeth, but it will smoothen out the picture slightly. If you want to try this out on a picture, externally check out this site ArcTencent

Next lets take a look at Seeds, this is essentially how Stable Diffusion knows how to keep track of a picture and -1 will create a random seed number for you that you can use to get that picture again.
Now let's look at Sampler, I stick to Euler and Euler_a and in the past this was the only thing that DeForum would work with. These 2 are the most compatible but you can try the other options which will give you different styles.
I will not go over subseed_strength, resize seed from width or height but here is the manual to learn more about that.

This next one is important; Steps improve the quality but also greatly increase the rendering time. The higher the steps are the better your quality will be subjectively. Keep this to 20-30 because the system is rendering 100's of images to stitch together for this video so that might take some time if you go over 30.
I will refer to the manual for DDIM_ETA, N_Batch, Make_Grid, and Grid_rows
Now for save settings and save samples. I recommend you check mark this as it will save your customer settings and rendered images to your Stable Diffusion > Output > Img2Img > (Batch Name Folder)

Let's take a look at batch settings. This first one is important, batch_name should be changed every time you run program as it will generate a new folder for each project. I put a number at the end of the name. I.e. DeForum1, DeForum2, etc... which will change the batch name folder I mentioned in the previous step.
I would not touch filename format, but you can check out the manual to see how to adjust this. It will change the way you rename the files.
Last setting for the run tab is seed behavior, I suggest you keep it to ITER for text to video as it will create a new seed for each image you create and put it on the name of the file.
Fixed will allow stable image to image renders when you're doing video interpolation, but this is a guide for 2D.
Alright, that was the run tab...

PROMPTS TAB
Now were diving into the animations prompts. This is basically your Stable Diffusion prompt generator request inside quotations separated by commas with the starting frame at the beginning.
The sample you are looking at here is from the developer and it is very complicated. See the DeForum quick guide and Math explained manual if you want to understand what's going on here.
Now let's take a look at a prompt made by a normal person

First and foremost, the animation prompt has to be inside curly brackets { } , just copy what you see in the picture.
So, let's dissect this.
First thing you see is a "0":, "30":, and "100": and this refers to second this prompt will execute.
Now look at the words in "quotations", this is your prompt, and you can generate as you normally would in Stable Diffusion as long as you keep it in the " " quotations and separate the prompts by a comma at the end. Notice the last statement does not have a comma because it is the end.
That's the basics for prompting...
KEYNOTES TAB
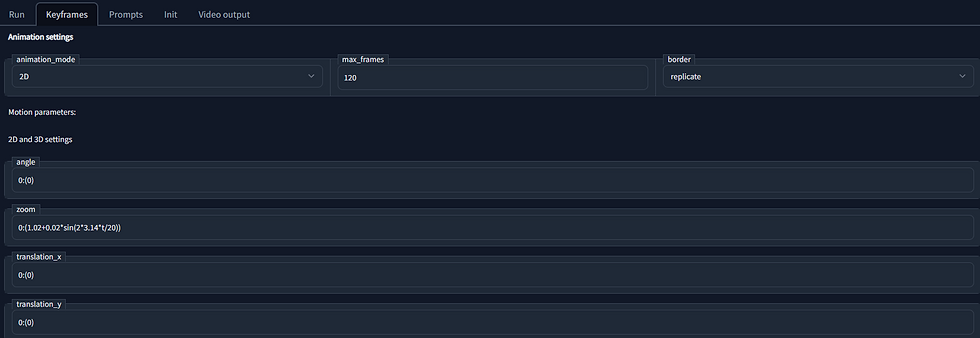
Now for movement or the keynotes tab which is by the most confusing element to this tool

Modes


rotations and not movements left to right. 3D will also have another option for Z rotation which is a combination of the X and Y axis which we are about to go over. Just think high school geometry and you should get the idea of the X, Y, Z axis.
Video Input will require you set up FFMPEG in the video output tab to work which is another app, but it will simply require you put the .exe file path in the FFMPEG location. This might change in the future.

Now for Max Frames and Border.

Max Frames is the number of images generated per prompt, I would keep this low as you try and discover what the video is producing and then increase back to 120 when you find something you like.
For border you have 2 options which is replicate and wrapped. Wrapped seems to make more sense as it creates more of the image to increase the size of the scene and replicate tries to copy more of what is already there.
Now let's look at 2D and 3D settings

This is actually very simple the first number (0, 30, 100) are the seconds when this motion command is executed. The number in parenthesis (10), and (-5) is the speed the motion will shit until it reaches the next command with positive being up, right, or clockwise and the negative numbers being left, down, or counter clockwise. These 2 numbers are separated by a colon and the commands are separated by commas. This is the same for angle, Translation_x, and Translation_y.
Zoom is a bit more complicated.

As you can see from this picture there is a crazy formula in there which is technically the same value as what's in the other settings but with the (value) in parenthesis using a formula to do something different. You will have to look at the manual to understand what's going on here.
I am going to erase what's in the zoom field and replace it with my own settings.
Here is my prompt

That's much better! But what does it mean?
Just like the other formulas the first number is the seconds at which the command executes so since this is set to 0 it means the video will start off with the zoom turned on until it reaches 30 seconds, and it will do something else.
Zoom is defined by 1.0 being static and anything above that will zoom in and anything below that number will zoom back out. So let's take a look shall we?
for the first command start at 0 seconds there is a value of (0.45) which is under the baseline 1.0 for a static or default zoom. (i.e., no zoom), since this number is lower that means that we are zooming out. This is actually not explained in the manual, but you will have to test it out to verify.
Now you see at the 30 second mark for the second command after the comma that the value is (1.0) which means the video will zoom back in until it resets to the default zoom level and stop there since there is no third command.
Now there is one last setting I will show you

CFG is something that is already in stable diffusion, but I will briefly explain. The lower this number gets the more creative the system will get.
It recommends that you keep it between 5-17 which will be the number in parenthesis. This will prevent your pictures from turning into Picassos.
Then there is denoise which 0 means no change will happen from image to image and 1 means complete change.
That's pretty much it. There are some other settings but have the main tools to create video and drive it the way you want it to go which is the main thing. To go into depth into the other settings you should check the manual. I won't get into it as a lot of the stuff is a bit subjective and may require trail and error.
Video is coming soon and I will put it down here. In the meantime you can watch the installation tutorial which briefly goes over the settings.

Looking at the 0:(10) this is standard for all the keyframe options so you can use 0:(0) as a template which I will put below.
Don't go to high and try and increase values by 0.1 for zoom and angle then 1 at a time for x or y. Here are some templates you can use and just replace values
for x, y, zoom, and angle, zoom goes back to static or no zoom at 1.0. Keep in mind you will have to go back to 1.0 to stop zooming and 0 for x, y, and angle to stop spinning or moving. All keyframes have to begin at the 0 frame and it will have to go up in orders. See example below.
0:(0), 0:(0), 0:(0), 0:(0), 0:(0), 0:(0)
Example: 0:(1), 100:(-2), 200:(2), 300:(-1), 400:(1), 500:(0)
Now a Template for the Prompt (replace the ________ and add a zero at the end of 10, 20,

300, to increase the amount of frames you want this to happen. Keep in mind you will have to increase the max frames, or you will get an error. Also! if you zoom is set to (0) you just see the ground all day.
{
"0":"_________",
"10":"_________",
"20":"_________",
"30":"_________",
"40":"_________",
"50":"_________"
}
Example: {
"0":"A beautiful waterfall made of rainbows in the clouds",
"10":"waterfall rainbow flows below the clouds onto earth"
}
Notice the last prompt does not have a comma. Don't leave a comma there or it will break
Stable Diffusion KeyStone and Prompt guide for 2D settings


Comments